Making Dyed Easter Eggs - Inspired by Pysanky Eggs
We decided to make some dyed easter eggs inspired by the Pysansky eggs from the previous post.
They were really fun to make and layer with different colours of dye.
Here are the materials you will need:
Eggs
Masking tape or washi tape
Food colouring
White vinegar (optional)
Small pots or jars to dye eggs in
You will need to blow your eggs out of the shells to empty them before you start. There is a post showing how to do this here
Or you could use hard boiled eggs for the activity if you prefer.
Here is how we made our own dyed eggs


You could also use elastic bands as a mask for the coloured dyes, adding more bands before each dip into the dye.
Fun Fact
Another interesting fact about the Ukranian folk art of making pysanka is the folk tale that is told about the decorated eggs. There is a tale that every year pysanka need to be made and decorated to prevent a giant serpent which is chained to a mountain from escaping and devouring the earth! If more eggs are made than the year before the chains holding the serpent are made a little tighter and the earth is protected for another year!
They were really fun to make and layer with different colours of dye.
Here are the materials you will need:
Eggs
Masking tape or washi tape
Food colouring
White vinegar (optional)
Small pots or jars to dye eggs in
You will need to blow your eggs out of the shells to empty them before you start. There is a post showing how to do this here
Or you could use hard boiled eggs for the activity if you prefer.
Here is how we made our own dyed eggs


Here are a couple of our more successful eggs - we made these ones using masking and washi tape instead of hot wax, to make it a bit more of a kid friendly activity.

The first thing we tried as a mask for the colour on the egg was PVA glue. This didn't work as a mask but does make quite nice marbled effect eggs as you can see in the images below

The first layer of colour we dipped eggs into was yellow. You can make the colours for the eggs by mixing food colouring with water and white vinegar. The white vinegar isn't essential, but if you want vibrant colours it does help the colour adhere to the surface of the egg

The PVA eggs after their yellow colour bath, these were left to try then another layer of pva was added

Then the eggs were dipped into a red food colouring, these PVA eggs came out marbled. Not quite like Pysansky eggs but quite pretty anyway

Next we tried using wax crayons instead of hot wax (again to make the activity a bit more child friendly)

A spiral pattern wax crayon egg - spiral patterns are very popular in traditional psyanky egg decorating as folklore said the spiral motifs were supposed to be the most powerful to protect the household from evil spirits. As demons were said to get lost in the spirals and get trapped there forever!

We also tried using masking tape and washi tape on the eggs, these ones were the most successful


After each layer of tape was put onto the egg it was dipped into a different colour of dye and left to dry, first yellow, then red and finally blue.
Its best to leave the eggs in the dye for about 5 minutes for the colour to take properly

These are the eggs after being dyed and before the masking and washi tape is removed
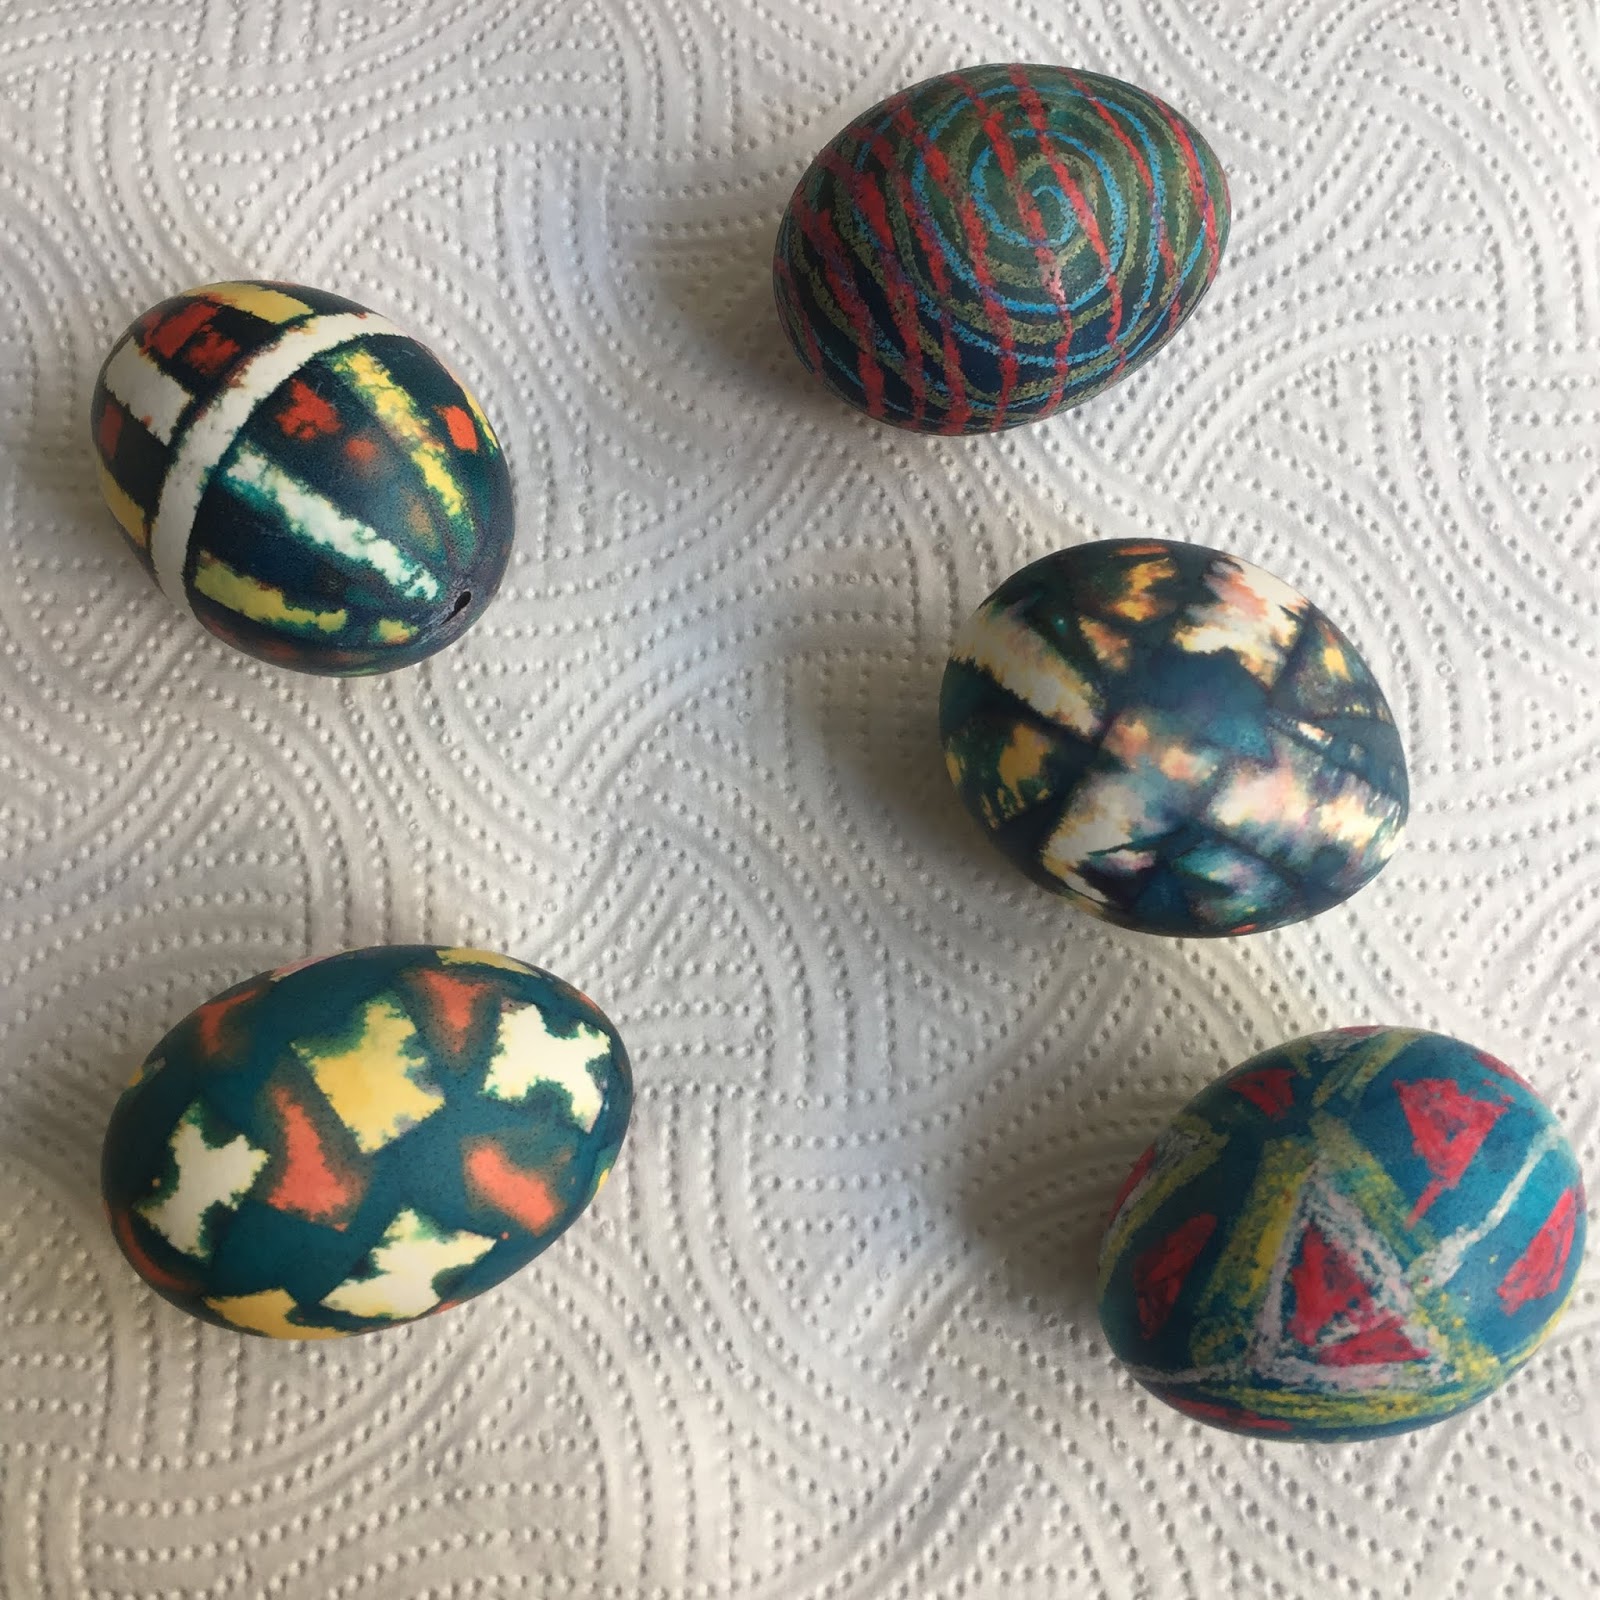
Low-fi Pysanky Eggs with the tape removed
You could also use elastic bands as a mask for the coloured dyes, adding more bands before each dip into the dye.
Fun Fact
Another interesting fact about the Ukranian folk art of making pysanka is the folk tale that is told about the decorated eggs. There is a tale that every year pysanka need to be made and decorated to prevent a giant serpent which is chained to a mountain from escaping and devouring the earth! If more eggs are made than the year before the chains holding the serpent are made a little tighter and the earth is protected for another year!


Comments
Post a Comment