How To Empty An Egg For Decorating
We have been making our own lo-fi pysanky eggs in the run up to Easter, you can read more about pysanky eggs in the blog here
To do this we had to learn how to empty the egg shells for decorating. So we thought we’d share how to do this activity ☺️🥚
Here are the materials you will need:
An egg
A push pin
A wooden skewer or toothpick
A screwdriver (optional)
A turkey baster bulb or a straw
A bowl to blow egg into
Kitchen roll for cleaning
First gather your materials (listed above)

Push the pin into one end of the egg, keep twisting it gently and it will eventually pierce the shell

Now also pierce the other end of the shell.
You don't need two pins I just put another one to show both ends are now pierced

You will now have tiny pin holes on both sides of the shell, but you need to bottom hole to be larger to blow the yolk out of the shell

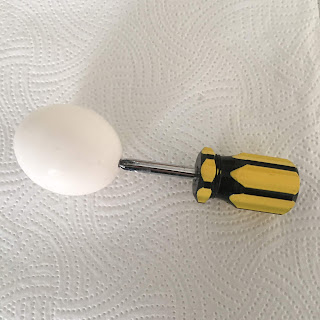
Use either a wooden skewer or a screwdriver to make the hole bigger at the bottom of the egg. I used a screwdriver here as it makes a nice round hole

Keep gently twisting the screwdriver or wooden skewer and you will make a larger hole at the bottom of the egg

Now pierce the yolk of the egg, using the wooden skewer or cocktail stick, so that it can be removed

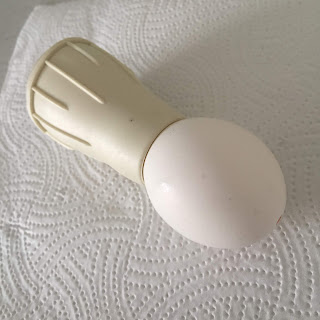
Place the bottom of a turkey baster over the smaller hole and blow the inside of the egg out of the larger hole into a bowl by pumping the baster bulb. You can also do this step using a straw if you don't have a turkey baster

Once you have pumped the inside of the egg out run the larger hole under water to rinse out the egg, then shake the egg to wash it inside and blow the water out into the sink. Repeat this until the water coming from inside the egg is clear.
Now your egg is empty and once it is dried will be ready to decorate. I hope you have fun trying this activity and decorating your own eggs for Easter!


Comments
Post a Comment